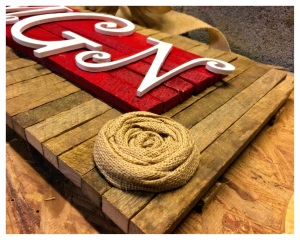
Burlap flowers are simple as a whole, but add a splendid, little touch to any craft you are creating! While there are various burlap-flower designs to make, I will show you a very easy way of how I make mine, which I use on my monogrammed signs.
First, you will need:
- burlap ribbon (Personally, I use 2 ½ inches wide with wired edges to help keep its shape)
- scissors
- hot glue gun
Step 1:
Leave the burlap ribbon attached to the roll as you are working with it to create your flower. This is easier to do only because you will not know exactly how much ribbon you will need to use until you have made the flower and reached your desired flower size.
Step 2:
Fold the ribbon in half with the wired edges faced down.
Step 3:
Take the very edge of the ribbon (or the wired edges) and curl it inward. Make sure the wired edges are almost lying on top of the burlap as you continue to tightly wrap and make the flower.
Step 4:
Continue wrapping until you have reached your desired flower size.
Step 5:
Cut the ribbon with scissors, take the cut end and tuck it in front of the flower.
Step 6:
Grab your hot glue gun, and as I say, “hot glue the mess out of it.” Remember to hot glue the front (where your end piece is lying in front). Personally, I glue it on that side because once you flip it over to make it the bottom of your flower, you will have a nice puffy top without any wired edges showing.
Step 7:
Flip over the flower and glue it to your craft.
As shown above, you can make any sized flower you want. I love to group mine together in corners. Also, I love to hot glue different buttons to the center of the flowers to either help cover up the curled edge that may be showing, or to simply give my craft a little more color.


